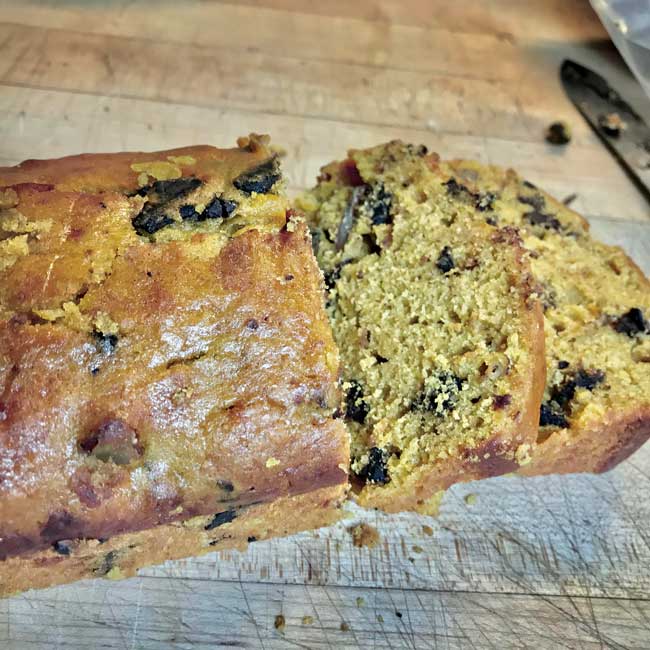
As many of our readers know, my family and I moved this summer to our home in Stevens Co. It has been quite a labor of love fixing up the place and we’ve had many expected and unexpected repairs. One of the unexpected repairs involved my range. Now, when I think of a range I don’t think there’s really all that much involved. It’s just turning a knob on the stove burners or heating up the oven with the touch of a couple buttons. Well, one baking disaster after another involving the oven and a stove top burner that decided it only operates on high and doesn’t turn off had me rather anxious about cooking let alone putting together new recipes. Once again I had to put in a call to our home warranty company to get the issue resolved, along with a dishwasher that leaked and a washing machine that refused to drain. It’s been quite the adventure the last few weeks in the Dengler household. But thank the good Lord for Dave at Jeffrey’s Appliance. He came out for a couple hours last week and got us all fixed up. We call him Super Dave now. Turns out my oven was running 15 degrees cooler than it indicated and when it had to heat itself back up, it over compensated and ran too hot. This doomed any baked goods. Anytime I opened the oven door to check for doneness, to find whatever I was baking was nowhere near done, the heating elements would come back on to heat the oven back up, only to overheat it causing catastrophe. Now that everything has been repaired I must get back to baking especially with the holiday season coming up. So this week I’m rerunning a favorite of our seasonal baked treats: Pumpkin Chocolate Chip Bread.
Pumpkin Chocolate Chip Bread
Prep: Preheat your oven to 375 (if your oven runs hot, dial it down but not lower than 350). Grease up two 8×4 (mid size) loaf pans, you can also line the bottom with parchment (I do as I hate stuck bottoms). You can use a full size loaf pan and make just one but you will need to bake it at 350 degrees for a lot longer….I’m impatient. Plus, 2 loaves means one to give away.
Tools: whisk, spatula, wooden spoon, liquid and dry measuring cups, measuring spoons, medium mixing bowl, large mixing bowl
Ingredients:
1 Cup Canned Pumpkin Puree (not pumpkin pie filling)
2 Eggs
1 1/4 Cup Sugar (can adjust up or down by 1/4 cup depending on personal taste)
1 teaspoon Vanilla (omit if you are using white chips)
1/2 Cup Canola Oil (can substitute 1:1 unsweetened apple sauce or your
go-to oil)
1 2/3 Cups All-Purpose Flour
1 1/2 teaspoon Baking Powder
Scant teaspoon Table Salt (keep your kosher and pink Himalayan in the pantry)
2 Heaping teaspoons of Pumpkin Pie Spice OR 1 teaspoon ground cinna mon and 1/2 teaspoon each of ground nutmeg and ground cloves
1 Cup of your favorite chocolate chips (I love mixing a half cup white
chips and a half cup semi sweet chips)
Generous 1/2 Cup of chopped pecans or not, you don’t have to do nuts
Alternative Mix-ins to try: cranberries, walnuts, pumpkin seeds
Mix it up dry!
In your medium bowl mix together all the dry ingredients with the exception of the sugar, that’s gotta dissolve in your wet ingredients or you’re going to run into some problems. Whisk those dry ingredients all up and set that aside.
Now the wet goes in the BIG bowl! Start with adding the sugar, eggs, pumpkin puree, and vanilla whisk that up and then, slowly whisk in the oil (or apple sauce) . Go slow or you are going to end up with an oil splatter on your shirt and that’s the pits. Don’t worry about over mixing this, you can’t.
STOP: Check that your oven is preheated and make sure your pans are prepared. If this step is complete, it’s time to get to work!
Incorporate: Dump those dry ingredients into your wet ingredients and fold with a wooden spoon until you see just a bit of flour, do not fully mix. Next, add the chips and nuts (optional) and fold in with a spatula or scraper until incorporated. Go slowly folding so as to not activate that gluten.
Add to Bread Pans and Bake: Scrape half the batter equally (or as equally as possible) into your 2 loaf pans and pop them immediately into your preheated oven. Set the timer for 40 minutes, if your oven has hot spots, check at 30 minutes and rotate for the last 10 minutes if you notice browning on one side more than the other.
DO NOT OVER BAKE: Insert a skewer, knife, or toothpick and if wet put them back in and check again in 5-7 minutes. You are looking for a moist crumble, not a clean insert. Trust me it will continue to cook as soon as you remove it from the oven.
Cooling: This is the hardest part for me because I really want a taste test. But let your pans cool on a wire rack for at least 10 minutes. Slide the back of a butter knife around the edge of the bread and flip the pans over. If you used parchment, remove it from the bottom. Continue to cool for at least 15 more minutes.
Serving: Turn your loaves upside down and cut from underneath, this makes for fantastic slices without compromising the integrity of the crest of the loaf. Measure those slices with your heart. I usually eat half a piece while I’m waiting for a cup of tea to finish brewing and then I eat the last half with my tea, there’s really no wrong way to eat it. You can have it for a treat, dessert, breakfast with a little butter, a midnight snack…you get the picture.


